Adding User Directory
Configure a user directory to sync with the user in supOS, and then you can log in to the platform through the user account of the active directory domain.
- The username of the active directory domain and the supOS platform must be the same.
- After synchronization, you cannot reset the password through the supOS platform.
- Log in to supOS, and then click
 at the upper-right corner to go to the design center.
 - Select System Management > System Configuration > Active directory, and then click New.
- Enter the information of the user directory and then click OK.
- Host/Port: The IP/port of the host where the active directory runs.
- Username/Password: Any username and the corresponding password on the active directory.
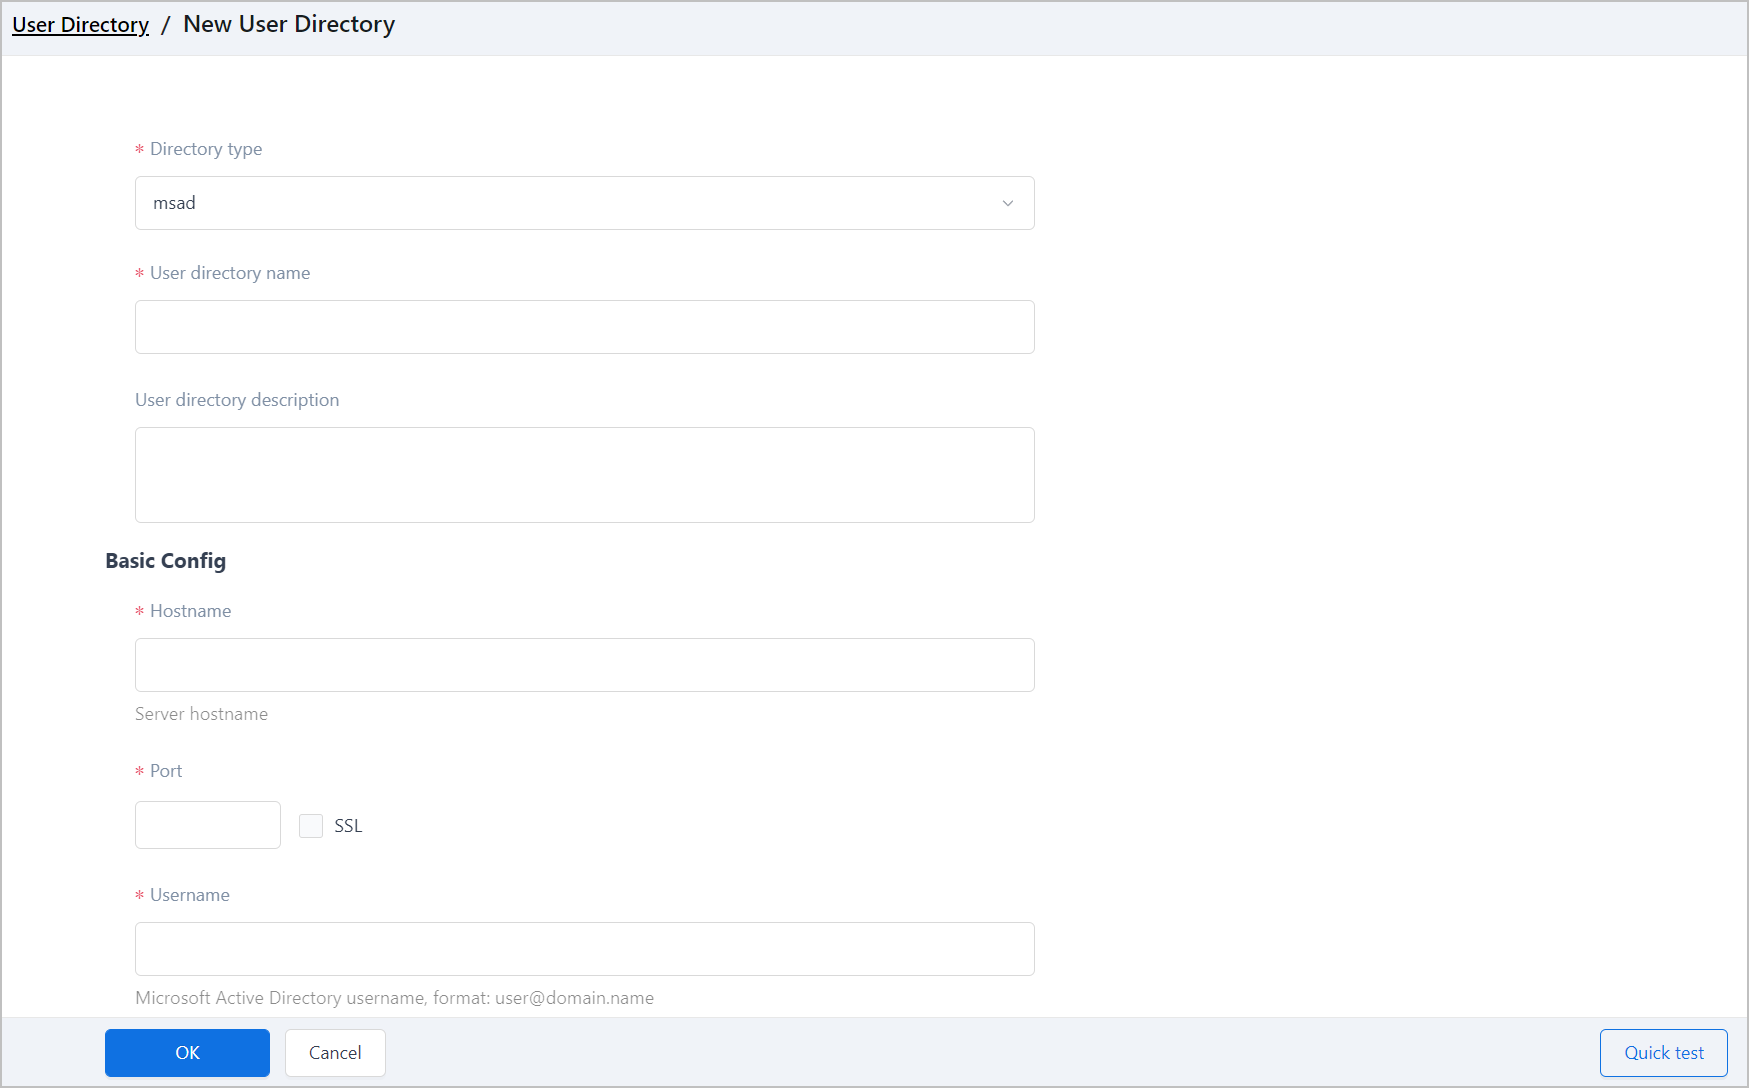
- Click Quick Test to check whether the connection with the server is complete.
- On the user directory list, click
 to enable the directory.
Only one user directory can be enabled at the same time.
- Create a user on the supOS platform with the same name as that of the user directory.info
For details, see Adding User.
Getting Print Authorization
For third party plug-ins that are available after authorization, you can copy the license key in the supOS platform to get authorization.
The default authorization key of printing service in this chapter is only available on the 192. or 10. segment. You need to apply for other segments.
- Click Printing service authorization.
- Get the license key from the third party plug-in, and then copy it to the supOS platform.
- Click Save.
Managing AK/SK Authentication
Third parties can access supOS and obtain specified data through openAPI with AK/SK key as auhthorization.
- Click AK/SK credential, and the click New.
- Enter the information and then click OK.
- Click Download in the pop-up window to download the key.
Managing Basic Image
When the basic image file does not meet the requirements of APP development, you can upload the needed image file.
- Click Basic Image Management, and the click New.
- Click Upload to select the image file, enter the file name and version, and then click OK.info
The file extension name must be .tar.
Setting Password
Set the password rules.
- Click Password Configuration.
- Set the rules.
- The account is locked out when the number of wrong attempts reached the limit.
- Select Yes under Encrypted Transfer, the password will be encrypted under AES.
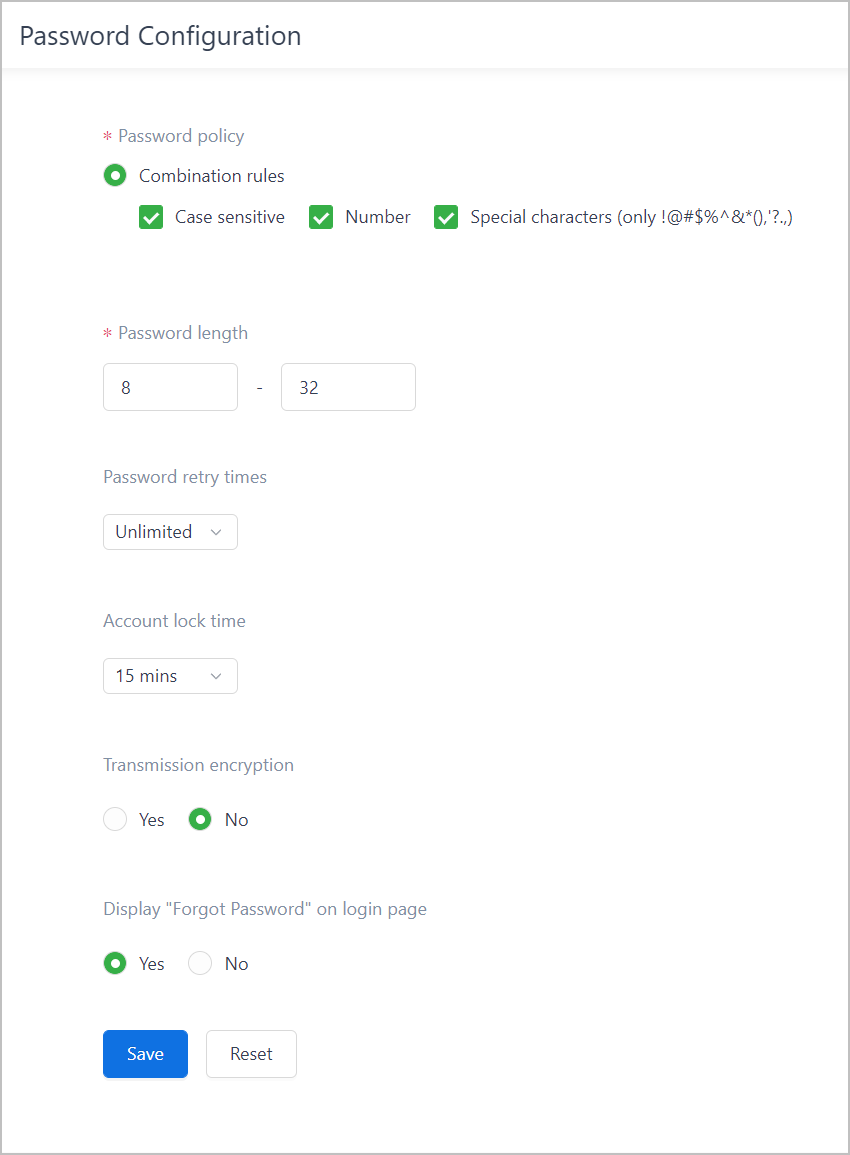
- Click Save.
Configuring Business Log
Set whether to enable business log display and management in operation center.
- Click Log Configuration.
- Select whether to enable business logs.
- Click Save.
Configuring Resource Permission
Set whether to display resource permission on permission lists.
- Click Resource permission config.
- Select whether to enable resource permission display.
- Click Save.
Converting PPT
Select a conversion method for converting PPTs on the platform.
- Click PPT conversion tool.
- Select a converting method.
- Click Save.
Setting File Size
Set the maximum file size for preview. Any file that is bigger than the set size cannot be previewed.
- Click Preview file size limit.
- Set the file size limit.
- Click Save.
Displaying Company for Multi-organization
Set whether to display the company filed when there are multiple organizations.
- Click Multi organization configuration.
- Set whether to display the company field.
- Click Save.
Setting Watermark
Set whether to add watermark to PDFs that are uploaded or converted during preview.
- Click Watermark configuration.
- Select whether to enable watermark, and then enter the watermark text and image according to specific requirements that you can see by clicking
 .
. - Click Save.
Configuring Login
- Click Login Config.
- Set the login rules.
- When the supOS platform on web clients or mobile clients stays inactive for a period that exceeds the set duration, you need to log in again.info
- The login expiration settings take effect upon second login.
- You can set the platform to stay logged in on the APP setting page.
- You can only Log in to supOS on one browser or start one session on supMobile at the same time when the Unique Login is enabled.info
The unique login does not apply to admin.
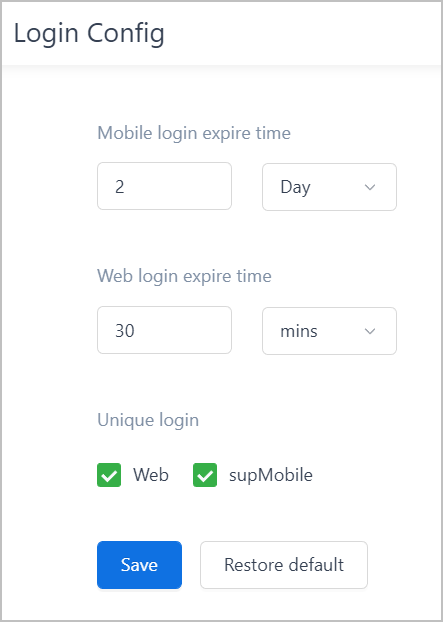
- Click Save.
Setting Organization Reference
Set whether to take reference of organization information across companies.
- Org info reference config.
- Select whether to take reference of organization information across companies.
- Click Save.
Configuring Theme
Set the theme of the supOS platform, and the change takes effect upon second login.
The theme changes apply to all users.
- Theme Configuration.
- Select a theme, and then click Save.
Configuring Log Policy
Various logs build up with the use of the supOS platform, set a strategy to clean the log data for free storage space and improve the platform performance.
- Log policy configuration.
- Set the strategy for each type of logs.
- The logs can be kept for up to 7300 days.
- 10 million pieces of logs can be saved at most.
- Set the time for clearing log data separately to prevent server from overload.
The supOS platform keeps all logs permanently by default.
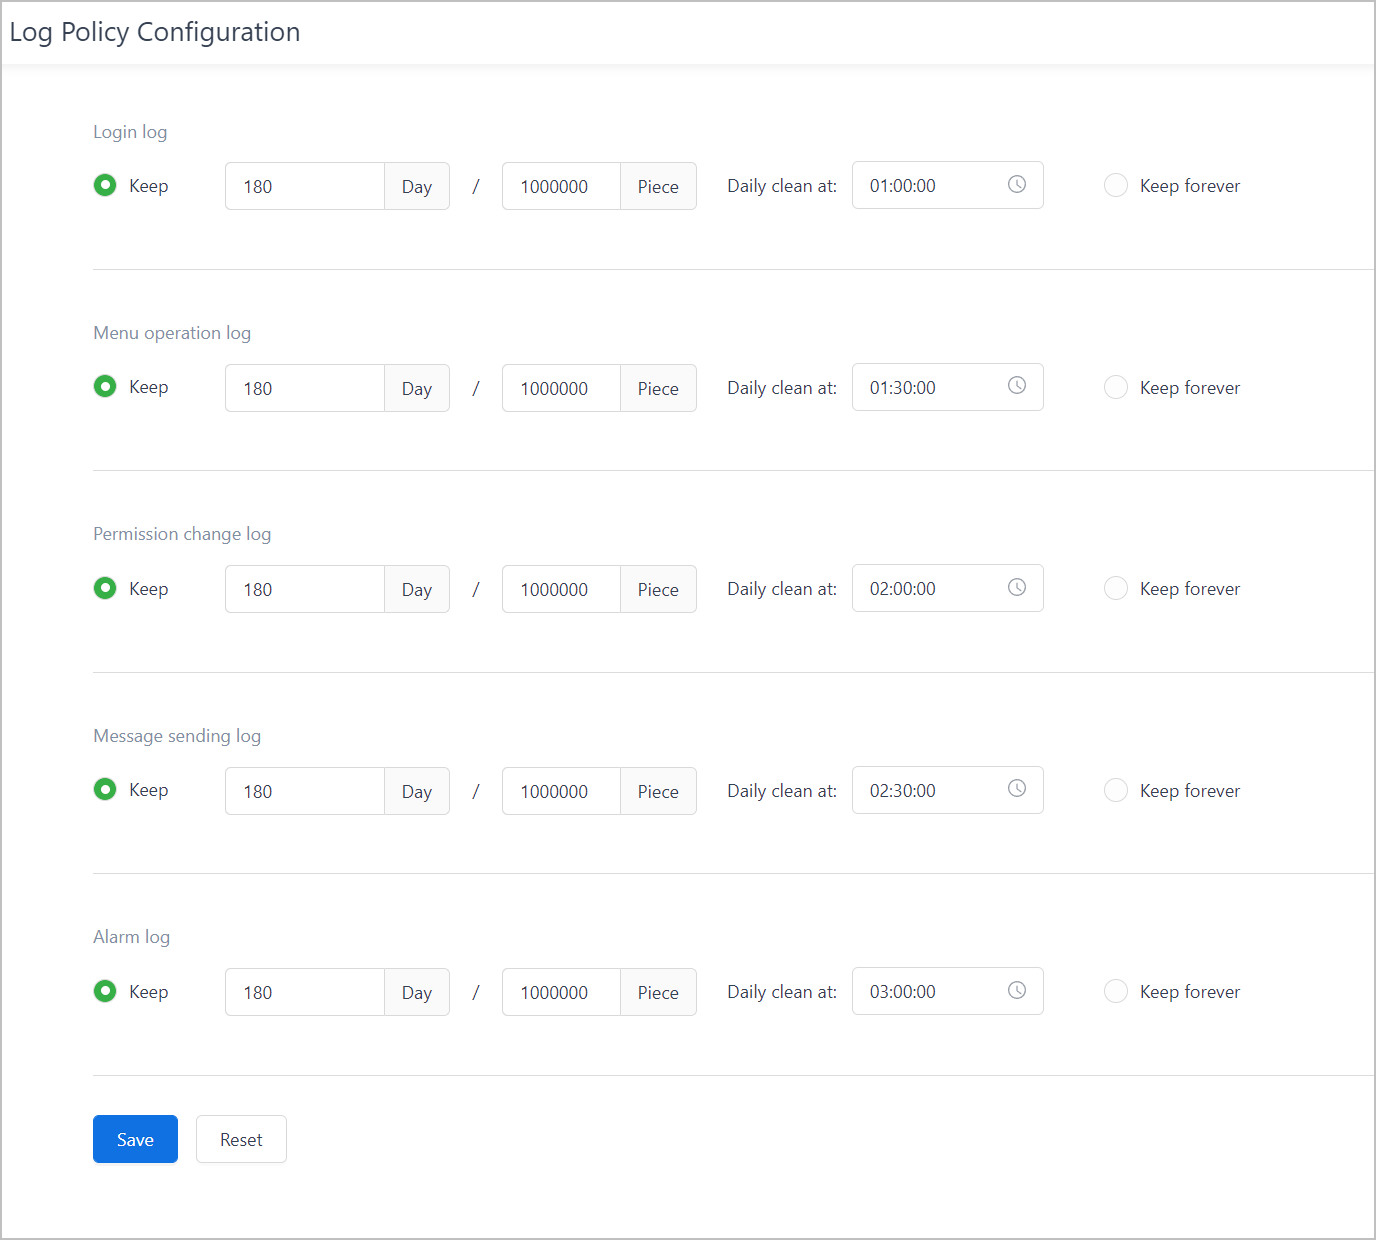
- Click Save.
The supOS platform clears the earliest log data when the set limit is reached.
Configuring APP Setting
If the business file ocd.xml is included in the micro service module installed from maintenance management, you can see the configuration information under System Management > System Configuration > APP Config.